Using Arduino to monitor septic alarm for fun and profit
April 2023 (657 Words, 4 Minutes)
My summer house has a septic alarm, which is pretty old school. The way the septic alarm works is pretty simple. Essentially, there is a floater (similar to the one found in old style toilet tanks) that is wired to a loud buzzer in the crawlspace. When the level of graywater is too high to make the floater rise, a loud buzz sounds in the crawlspace. This process usually goes as follows:
- Hmm, there’s something annoying going on, but I cannot point my finger at it…
- Is it a sound? Is something buzzing?
- Is it coming from below?
- OH FUCK, WE HAVE A SEPTIC PROBLEM!!!
During the “COVID years” I spent a lot of time working from that place and that was exactly when we did get an issue with the septic system. That was a) annoying, b) painful, and c) cost us about $2K to resolve. But we were extremely lucky to have been there at the time, otherwise the pain and the impact would be much, much higher…
Which in turn means that having an alarm system that is only audible for those who reside on the premises is not great for the summer house. The problem might arise at any time and we would have no idea. And so, I set up to find a way to be alerted remotely when my septic alarm goes off.
First attempt - buy your way out.
Given that we are in 202s, I was shocked to discover that there are only two or three WiFi-enabled septic alarms on the market. They all required full rewiring and, worst of all, the reviews were mediocre. The latter is not surprising - top-notch software and electronics is not their strength and most of the time work quite poorly (I’m looking at you, PumpSpy). So committing to one of those would be a risk with high upfront costs and unclear success. Hence a no.
DIY v1
Having pre-made systems off the table, I decided to build one myself. The requirements were formulated as follows:
- Avoid replacing the current system
- No frequent battery swapping (either a really long-term battery power or power it from the grid).
- Commodity components
- As non-intrusive setup as possible.
This left two main approaches: a direct monitoring of graywater level via a water level sensor or monitoring the sound from the alarm. The former approach was rejected as I didn’t fancy setting the contraption in the septic well as well as running more wires between the well and the house (see the note on batteries). The latter approach would avoid any of those problems being fully constrained in the crawlspace with power readily available.
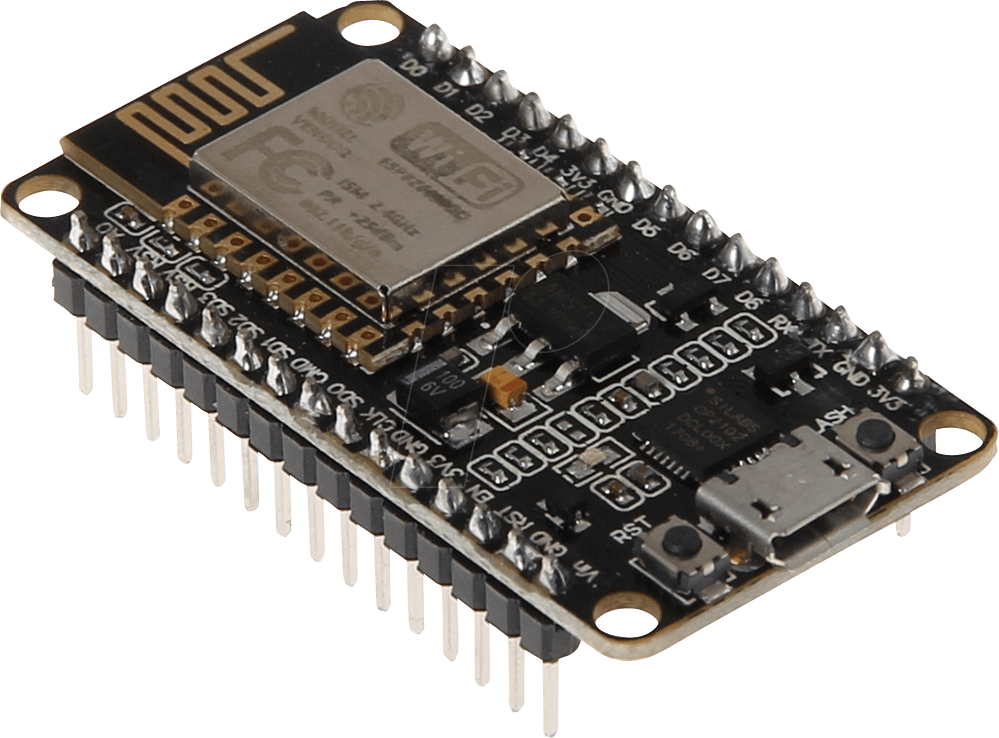
The first version was an ESP8266 board with a small LM393 microphone sensor. I mounted it in a small plastic project box with a USB cable coming out and an opening for the mic. The software was relatively primitive but it did the job watching for alarm to start or stop and posting signals on Ubidots IoT platform
Version 2
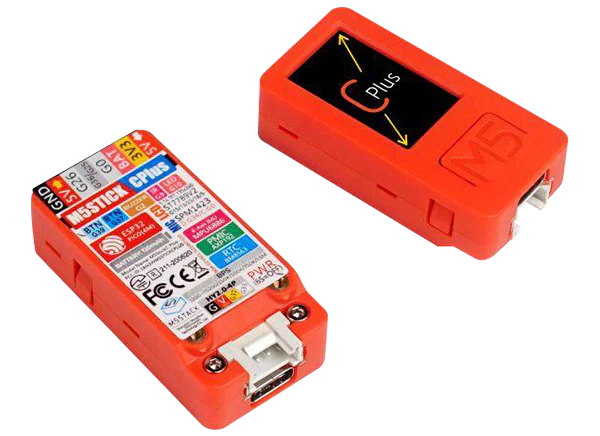
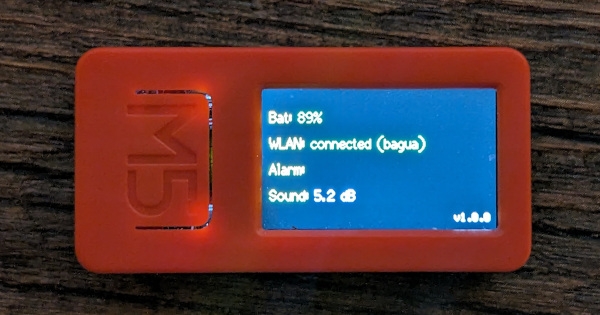
At some point I stumbled upon M5StickC Plus controller and it struck me as an almost ideal upgrade: an ESP32 core with hard plastic casing with microphone built in, a built-in battery, and even a nice color display. Some time was spent to play with it and to learn the ropes with MicroPython (and ultimately rejecting it due to the difficulties with interfacing hardware), but I eventually rewrote the software for monitoring making it much more reliable and self-sufficient (famous last words). This time I decided to interface with ThingSpeak as it was least pain (several of IoT providers have since gone paid tier only.)
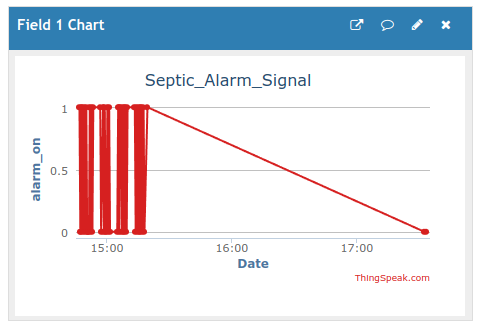
Anyway, the system is released and installed. The source code is on GitHub and it requires very minor tweaking to tailor to your needs. As of now, the monitor simply posts signals on ThingSpeak when alarm goes on or off or when the device is restarted. I did some very limited “live” testing with my actual alarm and it seems to be working fine.
Next steps
Constantly checking the IoT website has never been the plan, so next step would be to get the signals consumed and relayed via email or SMS. Hopefully, this could be done purely via ThingSpeak, but I will also experiment with direct emails via SMTP relay (there are better ways but all of them are unfortunately non-free).
Then, I still feel that I don’t take advantage of all other controls and sensors bundled into the package. Potentially, buttons could be used to set up the device, like to adjust the sound sensitivity (although entering WiFi credentials on a tiny screen using just 3 buttons is not something I would be aiming for).